Specificity
Exercise
- In the "index.html" file, replace the code with the following:
<!DOCTYPE html>
<html lang="en">

<head>
  <meta charset="UTF-8">
  <meta http-equiv="X-UA-Compatible" content="IE=edge">
  <meta name="viewport" content="width=device-width, initial-scale=1.0">
  <title>CSS</title>
  <link rel="stylesheet" href="./css/styles.css">
</head>

<body>
  <div>
    <h1>Section 1</h1>
    <p>This is the first paragraph of section 1</p>
  </div>
  <div>
    <h1>Section 2</h1>
    <p class="green">This is the first paragraph of section 2</p>
  </div>
  <div>
    <h1>Section 3</h1>
    <p id="specific" class="green">This is the first paragraph of section 3</p>
  </div>
</body>

</html>
- Save.
- If "Live Server" is not already running, right-click anywhere in the editor and select "Open with Live Server" from the context menu.
- In the "styles.css" file, replace the code with the following:
#specific {
  color: red;
}

.green {
  color: green;
}

p {
  color: blue;
}
- Save.
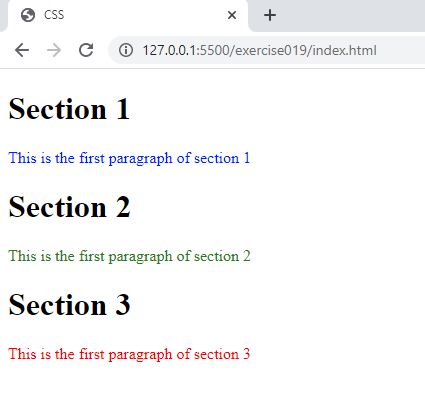
- In the browser, you should see the following:

Code Walkthrough and Explanation
Specificity in CSS refers to the determination of which CSS style should be applied to an HTML element. It is a weighting system that assigns a score to each CSS selector and declares the style that is to be applied to the HTML elements based on the selector with the highest specificity. In simple terms, specificity determines which style is the most specific and applicable to an element when there are multiple conflicting styles defined.
The specificity of a selector is determined based on its structure and the number of id selectors, class selectors, and tag selectors used. The more specific selectors such as id selectors have a higher specificity score compared to class selectors which are more specific than tag selectors.
Experiment with the Code
- Try adding a
bodyselector to thecssand making the color violet.
Video and Code References
Questions? Subscribe and ask in the video comments: